Friday, June 6, 2014

I'm back!

Sorry about the 6 month delay...but, I figure if Rob can revive our Jonesabode blog after a whole year, 6 months is nothing!  Right?

A lot has happened around here the past 6 months.  The big news being, I am pregnant!  We found out a few days before Christmas and are due the end of August.  Thankfully, I did not get the headaches like I did with Brady, but I felt pretty awful well into the second trimester.  That, on top of the wretched winter we had made things feel unbearable at times.  I am happy to say we are finally into what feels like summer; warmer temps, pool, outside dining.  It makes me very happy and every day I am thankful for this weather.


We decided to not find out the gender of this baby!  We have always wanted three kids, and since this will be our last and we have 2 boys, I really wanted to wait to find out.  Being the planner that I am, I realize this is very out of character for me, but the truth is I would really love a girl.  I think it's ok to say that, since we have 2 boys.  Although, 3 boys also sounds great in a lot of ways.  I think 3-boy-moms are very special and have had a few in my life who I think are probably the most influential women to me, so that is saying something!  

I've definitely gone back and forth over the past month or so whether or not to post on here.  I would really love to blog and share all the stuff we have been working on around here and just life in general, but I have a hard time making it a priority.  I am hoping that this summer is a little slower paced that normal (until the baby arrives) and that it will help me get into a routine of sharing.  But, I guess we will find out.

To start things off, I thought I'd share this little corner space in our living room.


 I felt like we needed a place where Aiden can do homework, or where the boys can sit and color or do crafts.  The dining room table has always served that purpose well, but it seems like those things are usually happening around dinner prep time, so to have a designated space seemed best.


We had this wood top piece from our closet turned office in the old house.  We converted that space back to a closet when we moved out for renters, so brought the top with us.  We found the legs from Ikea and I decided to spray paint them a pale aqua color.  We have 2 of those chairs floating around downstairs, so I just pulled one of those over.  It was a pretty low cost project, purchasing only the legs and the caddy at Home Goods which s perfect for storing all the things the kids need at hand.


I'm trying to keep the space fairly uncluttered, but it is nice to have a place to throw mail or a bill that needs to be sorted.  I would still like to have space in the living room for some storage for other things that don't fit on top of the desk like coloring books, paint stuff, etc.  We are still figuring out furniture in the living room and dining room.  I would say half of it we love and feels right, but the other half we are moving around a lot and trying to figure out what works best for our needs.  More on that later!

Hoping to be back soon with things that I never updated you on, and plans and projects for this summer.  I think it's going to go by fast, and I think that nesting hormone is finally kicking in!

Monday, December 9, 2013

The Dining Room

It's true, I lied to you back in October when I promised to have the Dining Room pictures up.  I am going to go ahead and blame my lack of blogging mainly on our terrible computer (although it's probably not true). We desperately need a new laptop, but we are waiting until after the New Year.  It takes me at least 45 mins, sometimes more, to upload pictures from the camera.  Then it can take me over an hour just to do a simple post.  I don't have that kind of time, or patience.  I'm hoping once we get a new laptop, you'll be seeing more of me.  But, I'm not making ANY promises ;)


I was inspired by the snow yesterday to take pictures of the dining room and do a blogpost.  Everything is pretty Christmasy in here, so things don't like quite like they usually do, but I am basically in love with how this room turned out.


I still don't have any window treatments.  I keep changing my mind on what I want to to do.  I love all the large windows, and the woodwork around them.  I realized yesterday how much I loved watching the snow outside these bay windows, and the large pine tree gathering snow on its branches.  That pine tree, that the previous owners planted when they're youngest was born, gives us a lot of privacy.  Which is probably why I haven't felt a lot of pressure to figure out the window treatments.


I bought the hutch off Craigslist way back before we moved in for $75.  I wanted something with lots of storage, but enclosed glass on the top so that things didn't get dusty.  I gave it lots of white paint, and painted the back of the shelves the same dark teal as the side table in the living room.  I'm basically obsessed with it.  I love how it turned out.  I also love that fits in this space so that when we're sitting on the sofa in the living room I can stare at it.


The large mirror came from my dresser that is in our bedroom, but I didn't want to use it there and it works great in here.  I had fun decorating it for Christmas.  


Yes, that is the same dresser that we did had in the living room.  I switched the dresser for an awesome old trunk that we inherited from my parents and I painted the drawers a darker color for in here.  I'll show you the trunk some day, but it just works better with the dresser in here and trunk in the living room.


I got this little buffet for $40 off Craigslist.  The size and mid-century lines were perfect,  but it was a little beat up on the top.  I didn't want another piece of white furniture in here, so I just painted the frame white.  After I changed the hardware on the drawers, and put a piece of nice paper on the door where there was a beat up woven screen, it was looking pretty good!  I need to find a better solution for the paper, but it works fine for now.


This shelf used to be in our bedroom in the old house.  We needed something here, and we wanted a place for the record player that was out of Brady's reach.  I don't love the lighter color wood in here, but it works for now.


I repainted the table because it desperately needed it.  I used enamel paint, and it worked awesome.  It is such a smooth finish, and wipes off so easily.  So far it has held up pretty well.

As far as things left to do in here, I would some day like another overhead light fixture, but this one is fine for now.  As mentioned before, I need to figure out what I want to do for window treatments.  And then lastly, I would like some new dining chairs.  2 of the wicker ones were too beat up, so we got rid of them.  I had these white ones on hand, and they work fine, but I may spray paint them until I find/can afford 4 new chairs.  I would ideally like something wood to offset all the white in here.


So there it is!  A couple other things to note, the paint colors are cashmere gray from Benjamin Moore on the top and Dark Storm from Valspar on the bottom.  The seashell print above the dresser is from Paper Source and was $4!  I have a couple other prints from there that you will see show up.  It's a  great option for cheap art!

I want to share the before pictures, and some of the process of taking the wallpaper down, but I'll save that for another time.

Saturday, October 26, 2013

Doorknobs

Happy weekend!  Hope everyone is enjoying this crisp, fall day!  I can't believe how cold it is this morning.  Rob has been up in Maine the past few days, so I'm feeling a little out of it.  He gets home in a couple hours and I can't wait to see him!

I thought I'd share a little quick fix I worked on this past week. I am working on the dining room post and am hopiong to get that up the beginning of next week.

Over the past couple months, I have really grown to love having an old house.  Even though it is so much work, it makes the benefits of all that hard work that much sweeter.  

There are so many great characteristics to old houses, one being the doorknobs.  We are SO fortunate that none of our doorknobs have been painted over.  Even though there are ways to get the paint off, I'm glad we don't have to worry about that step.  All they need is a good scrubbin'.


Bar Keepers Friend is the best.  It's cheap, and it gets the job done.  I happened to have some on hand that I bought when we first moved in to give our kitchen sink a good cleaning. 

Here's what most of the doorknobs in our house look like.  Gross.


I used a damp scouring pad with the Bar Keeper's Friend and just went to work.


Can you see the contrast of where I started to scrub?  One knob takes a little under 10 mins, so it's the perfect thing to do if I just have a short amount of time but want to get something done.

The end result

How crazy is that?!  And how gorgeous is that brass color?  I actually had no idea they would be this bright.  I put brass hardware on our cabinets without even thinking the knobs would match.

I then just wiped them down and used some Goo Gone to make sure I got all the nasty off.  Scrubbing took some paint off around the knobs, so after a quick touch up I was done.


I did all 3 doors in the kitchen, and now I just have to do ALL 6 of the upstairs doors.  I'm just so happy I discovered how easy this is.


 I realize this last picture gives you a little sneak peek into our kitchen.  It's been awhile since I posted our plans and to-do list.  We've gotten a lot done, but still have a few more things to finish up.

Hope everyone enjoys their weekend!

Thursday, October 17, 2013

The Living Room (also, I'm back, inspired by the return of DOMINO)

I realize it's been months since my last post, and really, there is no excuse.  I was actually serisouly thinking of giving up blogging for good.  I won't get into all the details of why, but alas, I have decided to return!    Just like my favorite magazine.


Oh, Domino...you always have a special place in my heart, even though I can't afford one thing on their new "store website".  (Not crazy about that whole idea, but hoping it works out and keeps them in business!)

One of my biggest struggles with blogging right now is getting pictures taken and onto the computer .  I have a hard time taking them when the light is right, when there is not stuff strewn all over the floor.  Don't get me wrong, I'm not trying to paint a picture that our house looks perfect all the time.  It doesn't, not even close.  Here's proof.


But, if I'm blogging about decorating, then I'm going to show you pretty pictures, and I'm not going to feel guilty for wanting to make things look as nice as they can before I take pictures.

So, here is the living room post.  (Remember, I said I was going to go through the house room by room to share progress).  Yesterday while Brady was napping and Aiden was still at school, I had the energy to fluff the pillows and take some pictures.

Our living room has actually evolved quite a bit since we moved in.  Our awesome console/cabinet that Rob built last year did not work in this space.  So, we decided to just accept it and move on.  We moved the buffet table from the dining room in here, and it worked perfectly, except that the wall to the left felt like it needed something.


Rob built these shelves using track brackets and I stained cheap Ikea shelves that he cut down to the right size.  It was a super easy, cheap project, and exactly what the room needed.  I wanted to keep a good 3-4 feet underneath open for toy storage, but wanted to be able to have shelves to "style".  I love having spaces to do this too, and that can be switched up easily.


Sidenote: if you are not getting storage baskets/containers from Home Goods, we can't be friends.  Their selection is INSANE and it is so cheap, it is ridiculous.  That huge basket for toys was $24.99.  Compare that to this Pottery Barn one.  I mean, WHAT?!!  If I ever meet someone who buys baskets from Pottery Barn, I will most definitely beat them up.


I also got the "dipped" one for $16.99, which I use for blanet storage over by the blue dresser.  Painted baskets are very in right now, and if I can find one for that cheap, that's already painted!  You see how exctited I get over these types of things?


The curtains I made from fabric I already had, I just need to get around to ordering more for the third side window.  I basically just hemmed the fabric to the size of the inside of the window, and hung them from a tension rod.  We flip them up around the back when they're up. With the kids always jumping  on the sofa, anything with strings is just not an option.  I love the woodwork in this house and I'm trying to keep a lot of it exposed.


I recovered our ottoman.  That thing was one of my best purchases because it has held up to the kids being so rough with it.  Finally, after about 5 years, it had a small rip in the back, which I didn't attempt to fix soon enough, so it turned into a big rip.  I already had the fabric from curtains in our old house that I didn't plan on using here, so I got out my trusty staple gun and went to town.  It cost nothing and looks great.


You will also notice that we brought down the white chair that was up in our bedroom.  This chair is so comfy and it wasn't getting good use in our bedroom.  It was also a little too big for the space next to the bed, so one day I decided to switch the two chairs.  I am hoping the white chair eventually ends up in the boy's room once we have more room in there.  Something a little more modern would be my preference for the space, but this works fine for now.  The side table next to it was inherited from my parent's move and I painted it dark deal.


The map in between the windows is also a cheap quick fix.  I would love a piece of art for that space, something abstract perhaps?  I'm trying to convince Rob to paint something, but he's being modest about his talent.  The map was a $10 ebay find.  It's actually a poster that is made to look like an old map and I mostly liked the soft colors.  Rob made the dowels for it and we just hung it with string.

This post is getting way too long, so I'm going to stop there for now.  Notice how I did not give you any peaks into the dining room?  I want to keep it a suprise!

Thanks for hanging in there with me.  I promise it won't be 3 months til my next post!


Tuesday, July 2, 2013

The bedroom

I wanted to do this post weeks ago, but I'm finally getting around to it.

Shortly after we moved in, I realized that painting our bedroom was a serious priority.  Even though I cleaned the room as best as I could, it still looked horribly dirty.  Also, this was the one room that I felt I had a good idea of what I wanted to do. I'm trying to take a lot of things slow with the house, especially on the decorating front, which is the part I enjoy the most.  But, there is SO much painting, cleaning, fixing to do, I find myself not really having as much excitement or vision for rooms, which is really weird for me.  But, with the bedroom, I had lots of vision.  Mostly because of this...


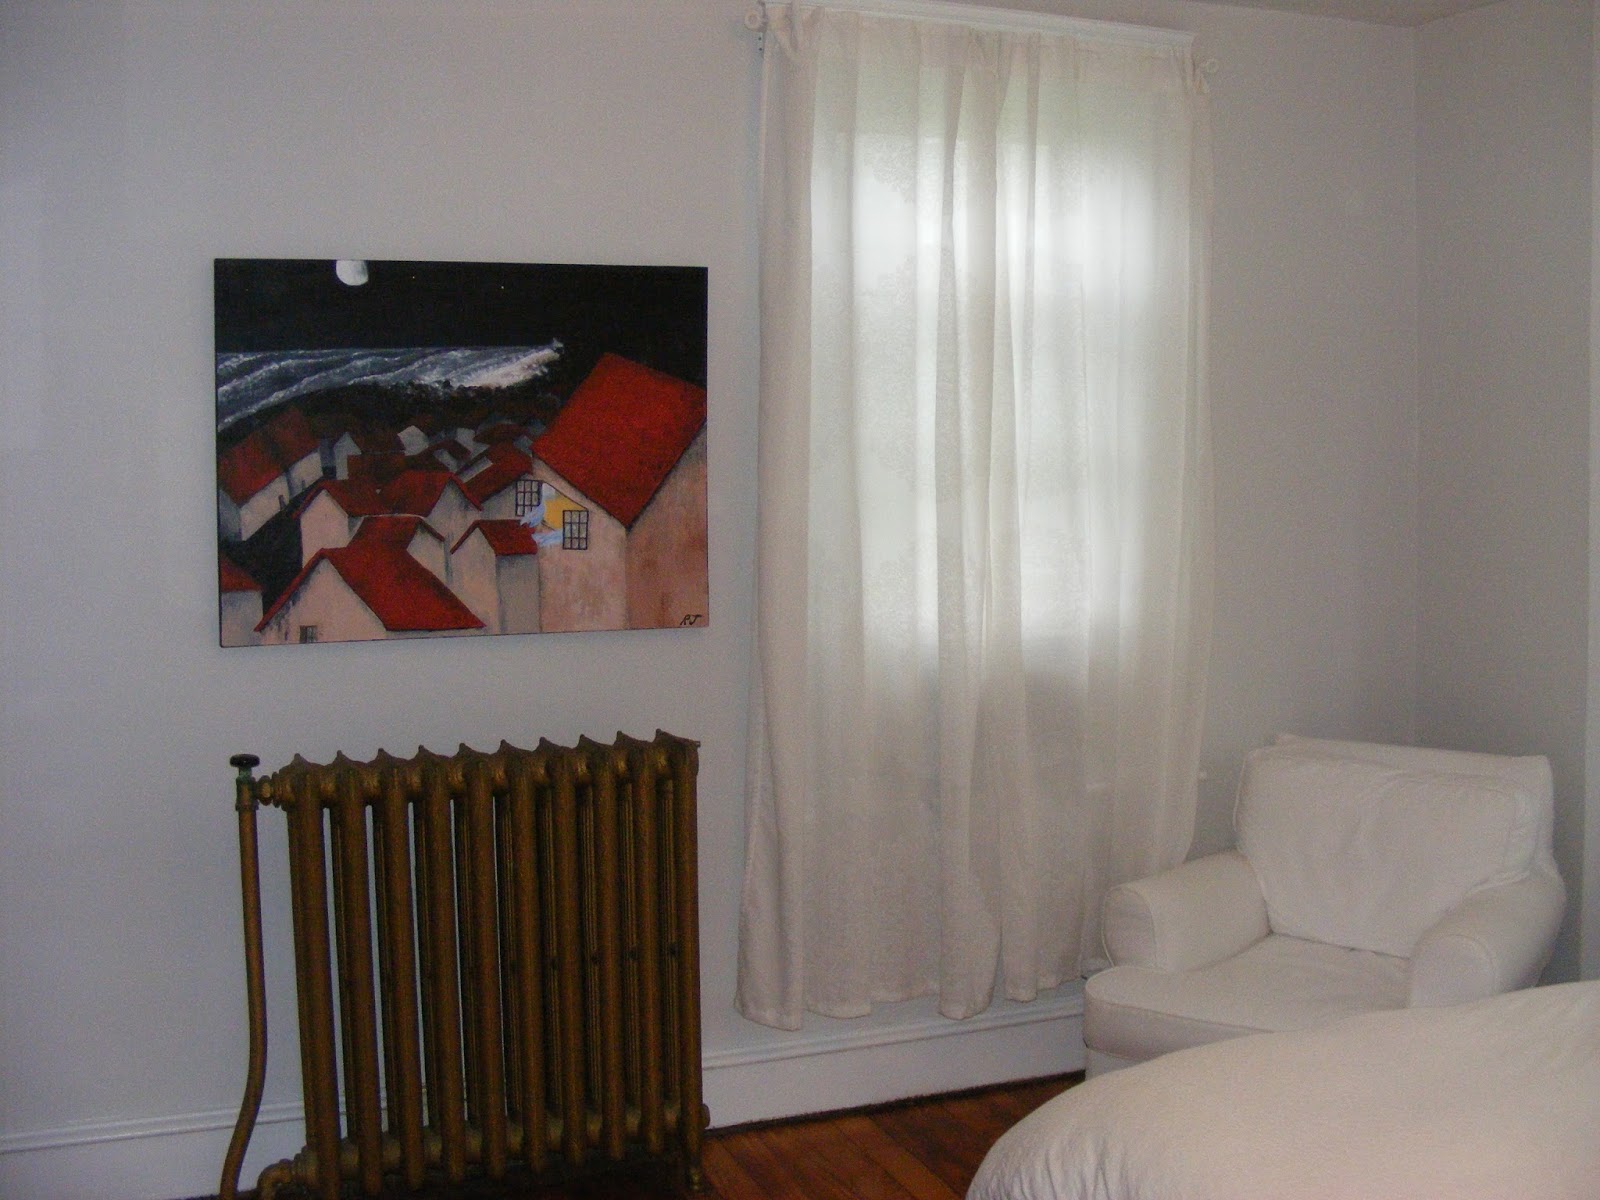
Rob painted this for me as a wedding present.  Honestly, I feel emotional as I type those words, because sometimes I feel like I don't deserve to be blessed with such an amazing husband.  This painting is so personal for me, and I feel like when I look at it, all I see is Rob... our relationship, our life...sorry if this is getting to gushy, but I'm just trying to express how much this painting means to me.

Rob hung this painting above a mantle in our bedroom as a surprise in our first apartment, and that's where is stayed until we moved into our house.  When we moved out of our apartment and into our house, I wasn't quite sure where to put it.  It ended up in our upstairs hallway, which quite frankly, I am ashamed of, and is probably why there's a good chance you've never seen it before.

After this past Christmas in our old house, I decided I wanted to redecorate our bedroom, and do so around this painting.   I had started to work on that a little bit before we found our new house, so when we moved, I pretty much knew exactly what I wanted to do in our new bedroom.

So, now that you have the long story behind this room and painting, here is where the room ended up...


I am obsessed with this space.  In our old house, I always struggled with our bedroom, and I felt like I could not get it quite right.  We actually hang out in our bedroom now, and it feels like a relaxing space.  I have a couple more small things to work on...but it is overall finished, which, other than the boy's room, is the only room I can say that about. 

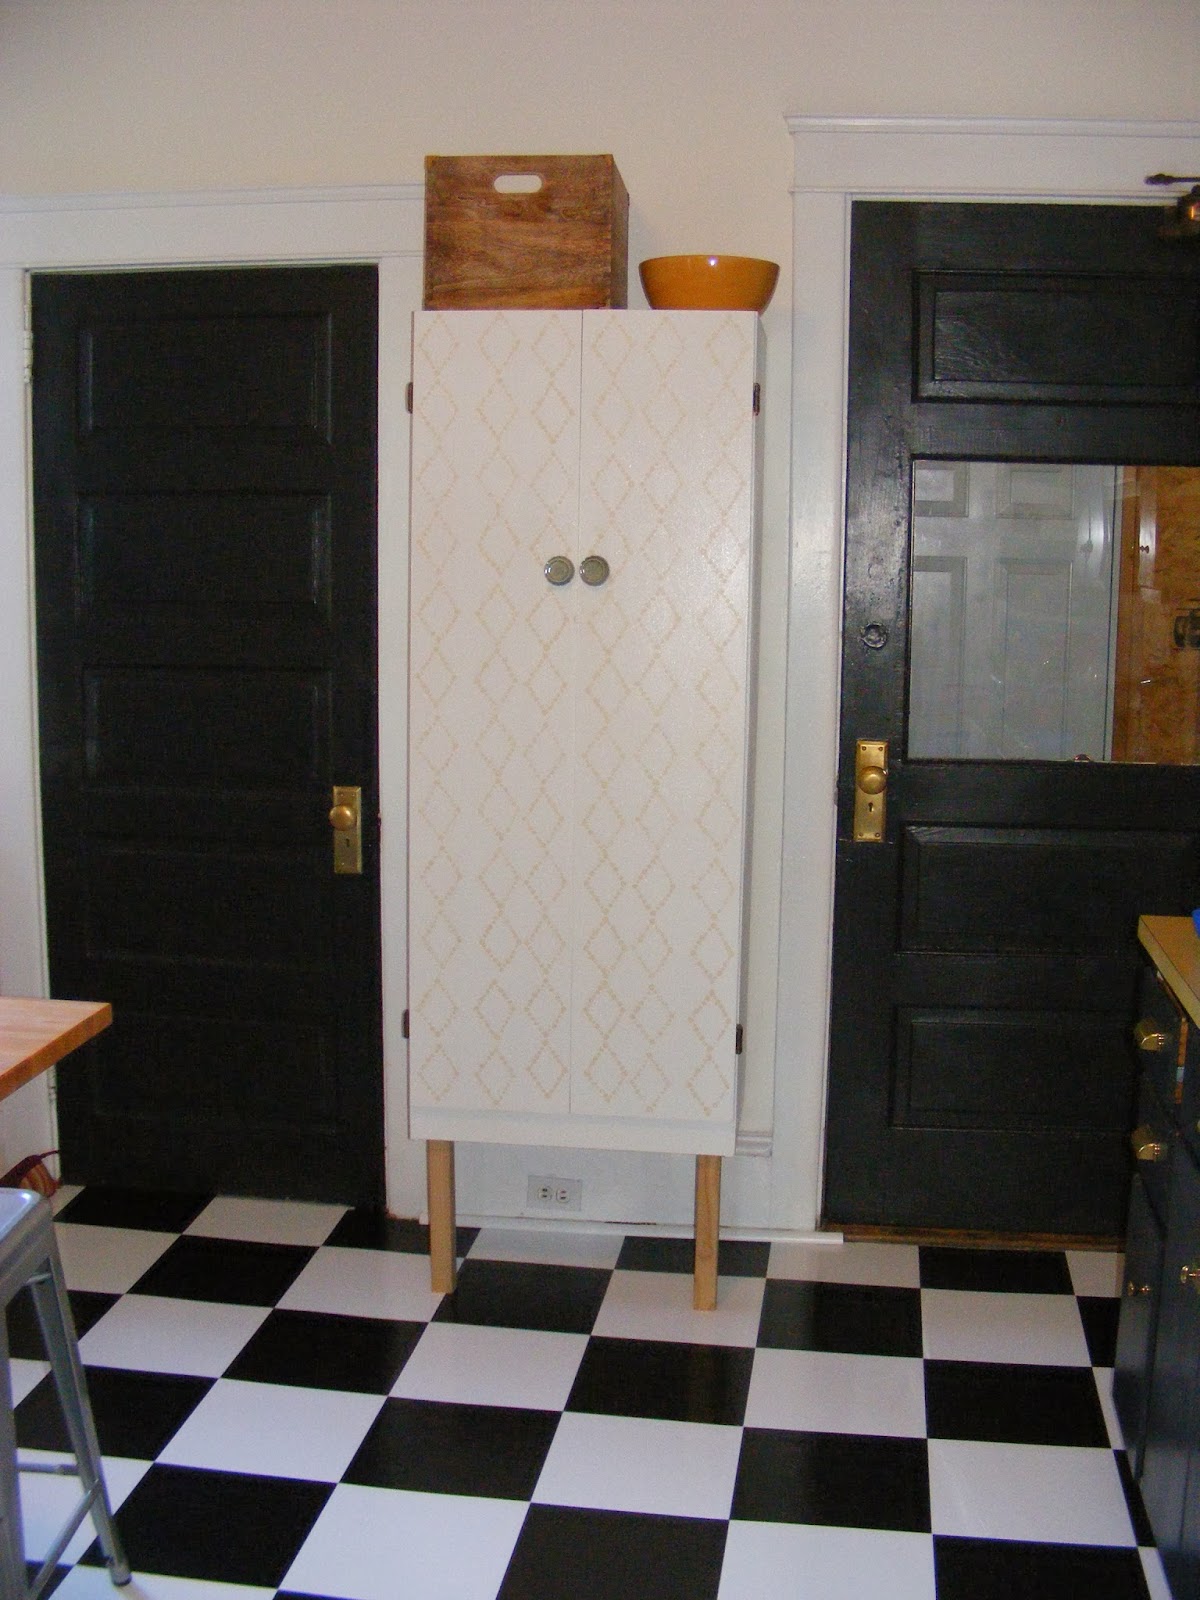
I painted all the trim, and doors bright white, and the walls my favorite gray (Seashell gray by Valspar).  I knew I wanted to do a black wall, and I love how it turned out.  It is directly across from the bed, and I think the white console looks so great against it. I love all the pictures in the frames on that wall, but wished the actual frames were more mismatched, instead of all just white.  It works for now because it's what I had, but it may be something I change up a little bit down the road.  The black is Blindfold by Valspar.

There is also a little nook type area right when you walk in the door from the hallway.  It seemed like the prefect place for some hooks and a long mirror.  I decided to paint that black as well since it is somewhat an extension of the wall across from the bed.  


Other than the paint, I basically spent no money on this room, which makes me feel pretty good, because I love it so much.  All the lights, frames, decor, etc., we already had.  The black dresser we have had since we got married and moved around a lot in our old house.  I'm glad to have it back. 

The other dresser came from my parent's house and was already painted white, but we decided to paint the drawers a dark gray color.  I have wood knobs that are similar to the one on my dresser that I haven't had the change to switch out yet. 

I love how you can see the whole room in this sunburst mirror

The white chair we have had forever, and may be a little big for that space, but we just love it so much.  It's the most comfortable chair we own, and I'm happy to have it in here.  I do want to put some shelves on the wall above it though to help break up all the white in that corner.  

The curtains I already had, but plan on getting a bay window curtain rod.  I also might add fabric on the bottom of the ones on the single window by the chair because the length bothers me.  

The rug was something I bought back at the old house when I was planning on redecorating.  It's from Overstock.


Another unexpected no-cost treasure was the light fixture.  I bought this shade awhile back when we rearranged the dining room in our old house.  It's huge, and a linen fabric, so it gives off good light.  I found it for something like $17 on target.com.  


All of the light fixtures in the bedrooms are these really old ceiling mounts with 2 bulbs.  I think one of them had a glass shade, but the other two were just bare bulbs.  I had the idea to somehow attach the shade to the light fixture that was already there, so it would be kind of like a flush mount.  But, I wasn't quite sure how to do it.  When I mentioned it to Rob, he thought getting a washer would work, and it did!  I just slipped it under the shade and then screwed it on underneath.  


I could not be happier with this space.  Even though there are some small finishing touches that need to be done, every time I walk into this room, I just can't get enough of it!  


Here's my list of things to do to get this room done:

-Bay window curtain rod
-knobs on Rob's dresser
-shelves above chair

And here's a couple before pictures, just to remember how far it's come!  I forgot those window storage boxes were there, it really opened up the space to take those out.


Monday, May 27, 2013

The Kitchen

In hopes to be better about blogging the process of our house, I decided that I would take rooms/areas one at a time, share what we've done so far and what we hope to do.  Hopefully that will keep you updated along the way.

I thought we would first start with the kitchen.  This is the room that probably has had the most done to it so far, and still has a fair amount to be done.

Let's start from the beginning:


All the wallpaper was ripped down.  How hideous was this wallpaper?    There was also some older wallpaper underneath in some places.  Rob's dad made it his mission to get rid of every last inch of wallpaper in here.


We moved the stove, which required some electric re-wiring, done by my father-in-law.  We took out the cabinet above it, and ripped out the backsplash thing on the wall, which left us with this:


We spackled over it and sanded down, instead of trying to get that adhesive off.  We figured that since the fridge was going there anyway, it wouldn't be too noticeable if the wall was a little rough.

We moved the fridge out of the middle of the room.   Look how small that space was where the fridge was!  I also added a chalkboard wall in the area between the kitchen and foyer, which you can kind of see in this picture.  And I painted the doors black.  I still have the basement door to paint.


Here's the island that Rob built using 2 cabinet pieces we found on the side of the road and butcher block from Ikea.  Besides being painted, the shelf needs to be finished on the top where we will keep all our cookbooks.  


This next pictures shows how we moved the stove over to the other corner by the window and the fridge where the stove was.  


We added the shelves from Ikea above the stove and Rob used a leaf from a table that was left at the house to build a small piece of countertop next tot he stove, which the Ikea cart fits under.  

We are planning to put a piece of pegboard above that (next to the shelves) for a couple pots.  

Here is the sink area that has had nothing done to, but I have big plans for. 


I'm hoping that we can keep the same sink but replace the countertop with butcherblock.  There is also more of that funny backsplash behind the sink, but I'm actually hoping we can keep that intact because  I have a plan for a backsplash, but we'll have to see how all that plays out.  


So, here's the long list of things left to do:

-Prime and paint all cabinets
-Add new hardware to all cabinets
-Add pegboard potrack
-Hang pantry cabinet between bathroom and back door (where fridge was)
-Replace counter top at sink
-Backsplash behind sink
-New ceiling light fixture
-New faucet
-New floor

The floor is a major undertaking that Rob and I are kind of dreading. We've been talking a lot about what to do because not only is the linoleum hideous, it's in terrible shape.  It's coming up in a lot of areas.  There is one more layer of linoleum underneath that, and then a layer of plywood.  The cheapest thing to do would be to rip up the two layers of linoleum put down a new vinyl floor, which I'm fine with...especially because I've always wanted a black and white checkerboard floor in the kitchen. 


Doing the floor while living here with 2 kids sounds very overwhelming, but we know that once we get all the other things done in the kitchen, that floor is going to be even more noticable and annoying.  

So, there is the kitchen update and plans.  I'm loving how things have been turning out and can't believe all that has been done in there, and pretty inexpensively so far.  We were fortunate that the appliances were fairly new and all work great.  Having to buy new appliances right now was not in our budget.  The funny thing is, in  a lot of ways, this kitchen has become more functional than our old one.  Probably because we are the ones that are planning it out, and being intentional with the set up and making things work.  

Thanks for sticking with me through this process.  Hopefully more updates to come soon!